An overview of the Gimp
Gimp for window
Getting the gimp
First of all, go to www.gimp.org and download the latest stable release for your operating system. The Gimp is aviable for Windows, Linux and Mac.
You can go directly here to download the latest windows installer.
If you're on windows, you need to download and install both the GTK runtime and the Gimp. Normally you'd prefer to install the GTK before you install the Gimp.
Once you are finished installing, open the gimp. If this is the first time you run it, it will ask you to tell him about what default directories to use and other things. Just leave the default settings and click next->next-next until it starts.
A first look at the Gimp
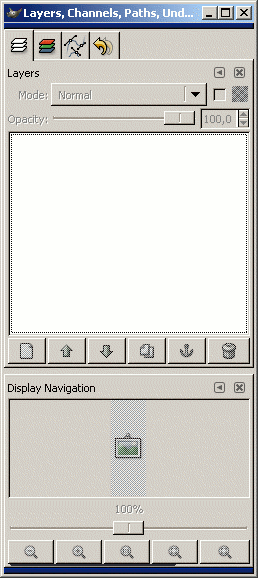
If you're new to the gimp, now you should be... surprised: The gimp's interface is quite defferent from the interface we usually see in other programs. It mainly consists of two windows, the main window and the layer window:
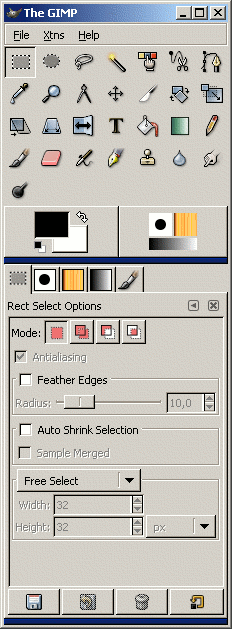
The first window is the main window. It is divided in two sections: in the upper section there is the application menu and a toolbare with the most common instruments used to edit an image, while in the lower section there are some tabs, the selected one being the instrument options tab.
Like the previous, the second window is divided in two sections: in the upper one there are some important tabs like "Layers" and "Channels". On the bottom we find the navigation tool, used to move quickly to different areas of the same image.
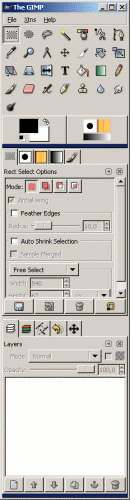
All the tabs and sections you see, excluding the toolbar, can be moved from one section to another, or outside the two windows in order to create a new window. If your monitor's resolution premits it, I suggest to move all the tabs in the first window, in order to have more work-space. This is my current Gimp layout:
Layers Layers Layers
Like any professional imaging program, the Gimp supports a feature called "Layers". But, you may ask, what are these layers?
Imagine your picture as a set of different slices, each one placed on top of the previous. These slices are called layers.
The next two images explain the layered structure:

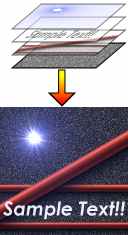
As we can see in both images, our picture is composed of four layers:
- The background layer: This is the basic layer. It is always present in any new image we create.
- One text layer: This layer contains only text
- Two image layers: These can contain any kind of image
Let's stop here for now. As a homework, try playing around with the Gimp!
In the next articles we'll start actually doing some stuff.
Back to articles